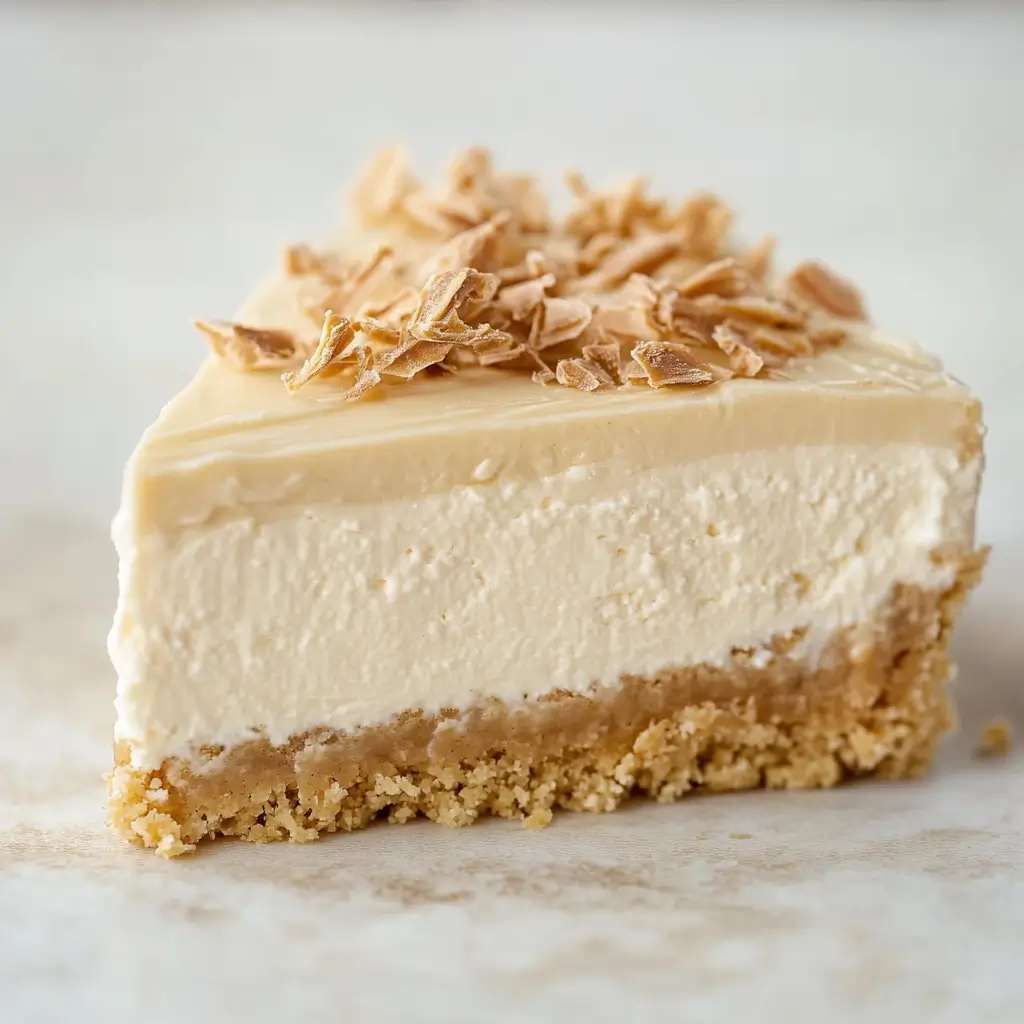
Craving a dessert that tastes like it took hours to make—but requires no baking at all? Then this No-Bake Caramilk Cheesecake will be your new favorite. With its buttery biscuit crust, rich and creamy Caramilk filling, and irresistible flavor, this chilled treat is perfect for busy weeknights, celebrations, or last-minute entertaining.
Because it doesn’t require an oven, this dessert saves time and effort. Additionally, its simple technique makes it approachable for beginners while still satisfying the most advanced home bakers. Therefore, we will walk you through everything—ingredient tips, troubleshooting, detailed steps, and a few secret tricks to ensure a flawless result.
What Is a No-Bake Caramilk Cheesecake?
A No-Bake Caramilk Cheesecake is a chilled dessert made by combining creamy ingredients—like cream cheese and whipped cream—with melted Caramilk chocolate, all poured over a crushed biscuit crust. Since it skips the oven, the dessert relies on refrigeration to set, resulting in a soft, mousse-like texture.
Because of Caramilk’s uniquely caramelized flavor, this cheesecake stands apart from classic no-bake recipes. Caramilk is essentially white chocolate that’s been gently caramelized, giving it a golden hue and sweet, buttery notes. When paired with the tanginess of cream cheese, it creates a balanced, luxurious bite.

Although the concept is simple, it delivers serious flavor impact. In fact, it’s a favorite at family gatherings, especially in warmer months. Moreover, the ease of preparation makes it a go-to for novice bakers or those short on time. Still, the final product looks and tastes gourmet.
Also, this dessert makes a great canvas for creative flair. For instance, you can serve it in jars for picnics or swirl the top with extra Caramilk for added visual appeal. Furthermore, it adapts well to various toppings like chopped nuts, sea salt, or a dusting of cocoa.
Fun Fact: Caramilk was originally launched in Australia and New Zealand. However, its cult following quickly spread worldwide, particularly due to social media buzz and nostalgic flavor.
Which Cream Cheese Is Best for No-Bake Caramilk Cheesecake?
When it comes to no-bake cheesecakes, cream cheese isn’t just an ingredient—it’s the foundation. Therefore, using the wrong kind can make or break your dessert. Always choose full-fat, brick-style cream cheese for optimal results.
Although spreadable cream cheese seems more convenient, it contains added moisture and stabilizers. Consequently, it won’t firm up as nicely and could lead to a runny filling. Instead, brick-style cream cheese provides the density and richness needed for a firm, smooth texture.
Philadelphia is the gold standard in many kitchens, largely because it delivers consistent texture and flavor. However, store brands can also work if they offer a dense, full-fat option. Additionally, make sure the cream cheese is at room temperature before you start mixing. This helps prevent lumps and ensures a silky finish.
Furthermore, using quality cream cheese improves shelf life and structure. For example, a cheesecake made with low-fat alternatives might collapse or separate after a day in the fridge. Conversely, full-fat cream cheese ensures the cheesecake holds its shape beautifully—even days later.
Additionally, other key factors affect the outcome. Firstly, always check the label to ensure no added herbs or flavorings. Secondly, avoid whipped cream cheese, which is aerated and lacks the structure needed for a no-bake base.
Expert Tip: If you’re using cream cheese from a tub in a pinch, drain off any excess liquid with paper towels before mixing. This minimizes moisture and improves firmness.

Ingredients and Instructions for the Ultimate Caramilk Cheesecake
Although this dessert feels luxurious, it’s surprisingly easy to make. Below, you’ll find a well-structured ingredient list and step-by-step instructions. These ensure even first-time bakers can succeed.
Because consistency is everything, follow the ingredient ratios closely. Additionally, prepare your workspace beforehand to streamline the process.
Ingredient Table
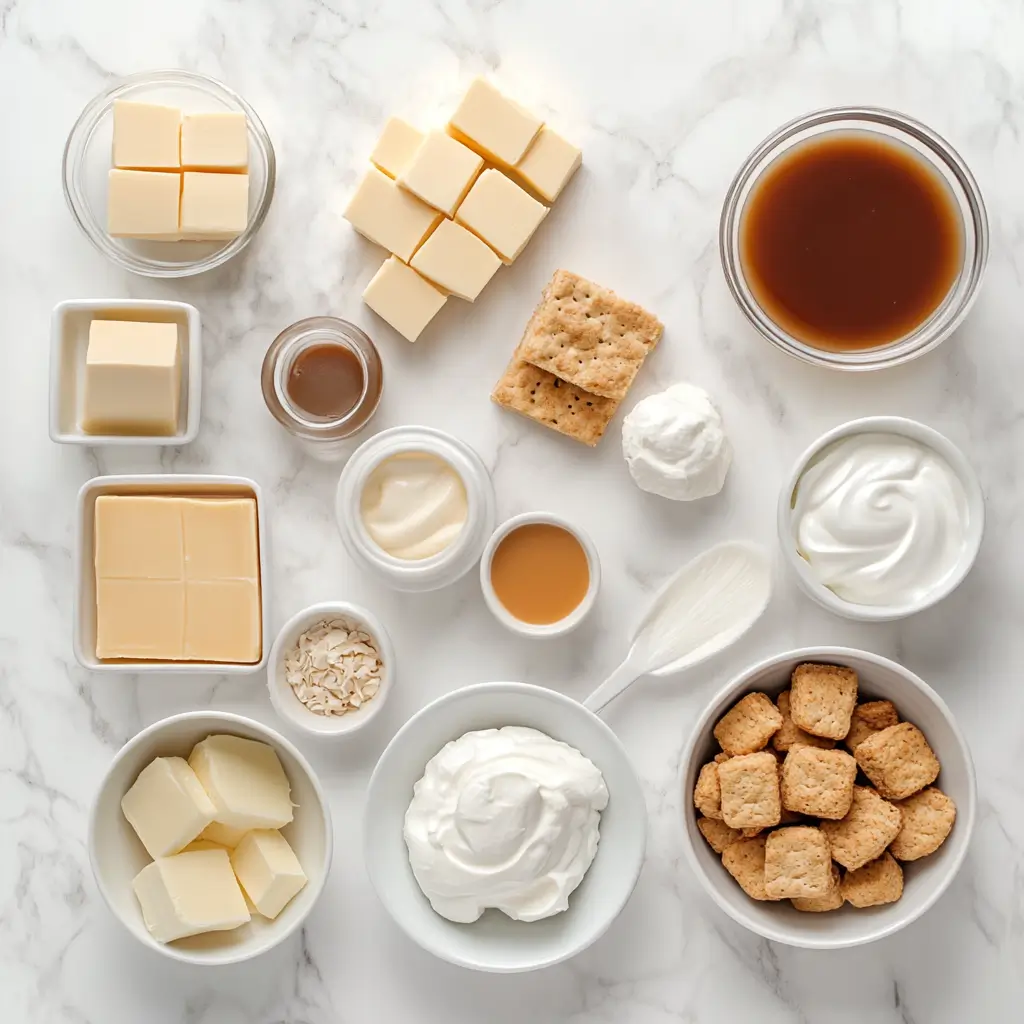
| Ingredient | Amount | Notes |
|---|---|---|
| Cream Cheese | 500g | Full-fat, brick-style |
| Caramilk Chocolate | 200g | Melted and cooled |
| Digestive Biscuits | 250g | Crushed into fine crumbs |
| Unsalted Butter | 100g | Melted |
| Whipping Cream | 250ml | Whipped to soft peaks |
| Icing Sugar | 50g | Adjust to taste |
| Vanilla Extract | 1 tsp | Optional but adds flavor depth |
| Gelatin (Optional) | 1 tbsp | Use for a firmer cheesecake |
Quick Reminder: For a more dramatic presentation, consider using chocolate shavings, sea salt, or edible gold leaf on top. These additions boost both taste and visual appeal.

Step-by-Step Instructions for No-Bake Caramilk Cheesecake
Although the steps are simple, following them precisely guarantees a stunning dessert. Here’s how to build your cheesecake layer by layer.
Step 1: Make the Crust
Firstly, combine crushed digestive biscuits and melted butter. Mix until the texture resembles wet sand. Then press the mixture firmly into the bottom of a springform pan. To ensure a clean base, use a flat-bottomed glass or measuring cup. Refrigerate for at least 20 minutes.
Pro Tip: For a crunchier base, toast the biscuit crumbs for 5 minutes in a skillet before mixing with butter. This enhances flavor and adds stability.
Step 2: Create the Filling
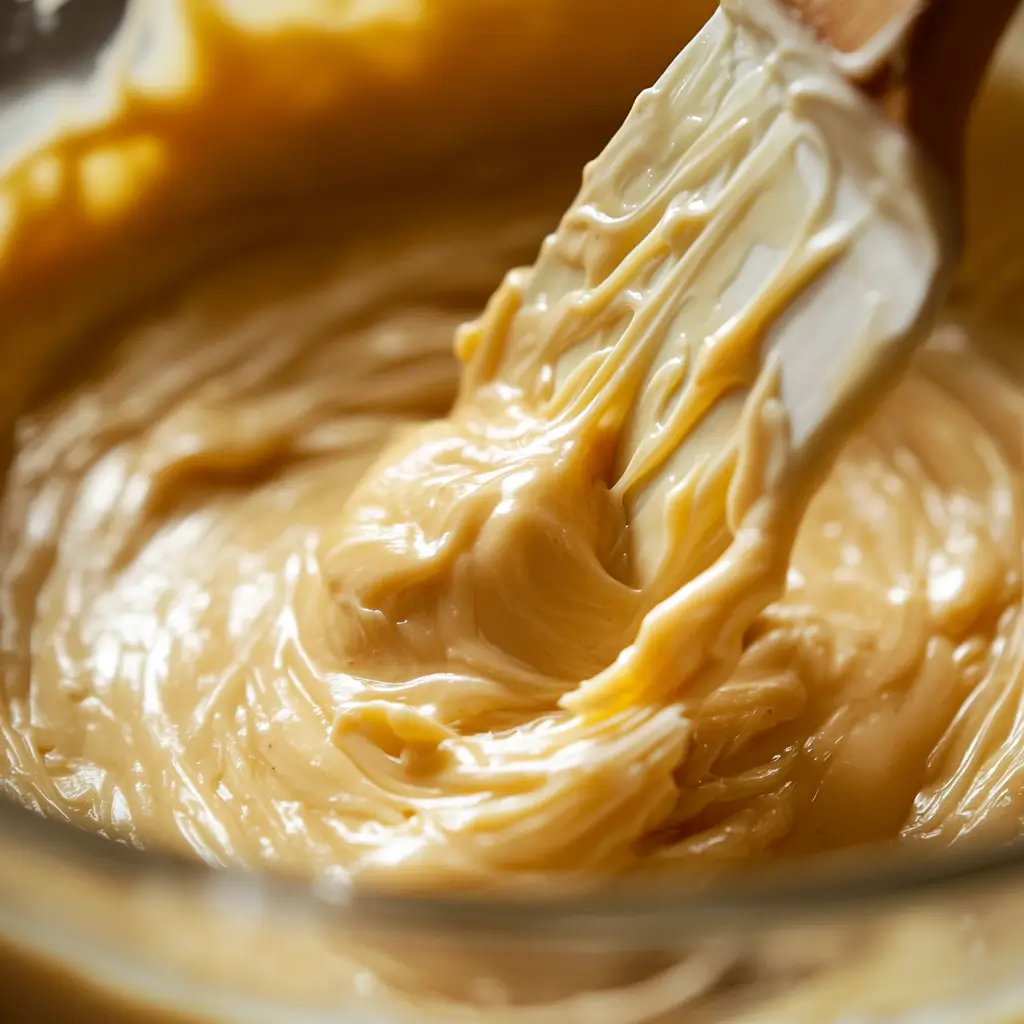
Secondly, beat cream cheese, icing sugar, and vanilla extract in a bowl until smooth. Slowly add in the melted Caramilk chocolate, ensuring it’s not hot. Mix until fully blended.
Separately, whip the cream to soft peaks. Gently fold the whipped cream into the Caramilk mixture with a spatula. If you’re using gelatin, dissolve it in a bit of warm water, let it cool slightly, and stir it in now.
Helpful Hint: Always fold whipped cream, never stir vigorously. Folding preserves the airy texture and helps the cheesecake set properly.
Step 3: Assemble and Chill
Thirdly, pour the filling into your chilled crust. Use a spatula to smooth the surface. Gently tap the pan to release air bubbles. Cover with cling wrap and refrigerate for a minimum of 6 hours, though overnight is best.
Although waiting might be hard, it’s essential. Chilling allows the fats and chocolate to set fully, ensuring clean slices and perfect texture.
Additionally, avoid moving the cheesecake during chilling. Sudden shifts or temperature changes can lead to cracks or uneven settling.
Optional Step: Just before serving, drizzle extra melted Caramilk on top or sprinkle with chopped nuts for a gourmet touch.
Why Is My No-Bake Caramilk Cheesecake Not Firming Up?
Although no-bake cheesecakes are easy, they can occasionally misbehave. If yours isn’t setting, several factors might be involved.
Firstly, check your chill time. Cheesecakes need at least 6 hours in the fridge to firm up, though 8–12 hours is even better. If you cut into it early, it will likely be too soft to hold its shape.
Secondly, consider your ingredients. Low-fat cream cheese and unwhipped cream often cause structure issues. Use full-fat ingredients and whip your cream before folding. Also, if your chocolate was too hot when added, it might have affected the emulsification process.
Furthermore, excess moisture ruins the setting process. Therefore, always drain tub-style cream cheese if that’s your only option. Similarly, avoid over-mixing the filling—doing so breaks down its ability to hold form.
Fix-It Trick: Place your cheesecake in the freezer for 30–45 minutes before serving. This won’t change the taste but will firm up the texture in time for slicing.
Common No-Bake Caramilk Cheesecake Mistakes to Avoid
Even though the process seems simple, a few missteps can lead to disappointing results. Here’s how to avoid the most common issues.
Overmixing the Batter
Because it weakens the structure, overmixing leads to a loose, pudding-like consistency. Therefore, mix just until ingredients are blended.
Skipping the Chill Time
As mentioned earlier, under-chilling leaves your cheesecake soft and unstable. Hence, patience is essential. Let it rest overnight for best results.
Wrong Cream Cheese Type
Soft or low-fat cream cheese includes water and additives. Consequently, these variants result in a thin or wet filling that won’t hold its shape.
Improper Ingredient Temperature
Make sure cream cheese is soft (room temperature), but whipping cream must be cold. Otherwise, it won’t whip correctly or hold peaks.
Quick Tip: If you’re in a rush, place the cheesecake in the freezer for one hour before refrigerating. This jump-starts the setting process but don’t leave it frozen for too long.
Delicious Variations on No-Bake Caramilk Cheesecake
After perfecting the classic version, it’s natural to get creative with your No-Bake Caramilk Cheesecake. Therefore, this section dives deeper into exciting variations that cater to different tastes, events, and presentation goals. Because versatility is one of this dessert’s strengths, there are countless ways to elevate it.
Salted Caramilk Cheesecake
Although Caramilk is inherently sweet, a touch of salt brings depth and balance. Therefore, consider adding flaky sea salt on top of the cheesecake before serving. Because salt enhances the caramelized flavors of Caramilk, each bite becomes more complex and satisfying.
Furthermore, if you’re baking for a more sophisticated crowd, a salted version adds a gourmet flair. For instance, swirl salted caramel sauce over the top before chilling. Alternatively, infuse the crust with crushed pretzels for a salty crunch.
Pro Tip: Stir 1/8 tsp of salt into the melted Caramilk before mixing it into the filling to create a subtler savory edge.
Mini Cheesecake Bites
Sometimes, presentation matters just as much as taste. Therefore, making mini cheesecakes is a practical way to impress guests while offering easier portion control.
Firstly, prepare the crust and filling as directed. Then, instead of a springform pan, divide the crust among muffin tins lined with cupcake liners. Add filling and smooth the tops. Afterward, chill for at least 4 hours before serving.
Because individual portions chill faster and are easier to serve, these make excellent party desserts. Moreover, you can personalize toppings on each mini cheesecake—such as chopped nuts, gold leaf, or caramel drizzle.
Serving Tip: Use a piping bag for a clean, professional finish when distributing filling into liners.
Additionally, for more ideas on customizable servings and modern presentation techniques, refer to this post about Bento cake, which highlights how creativity enhances everyday dishes.
Frozen Caramilk Cheesecake Bars
If you’re prepping for a summer event, frozen bars offer a refreshing twist. Instead of refrigerating, freeze the cheesecake in a rectangular pan lined with parchment paper. Once firm, cut into bars and dip the bottoms in melted chocolate. Then refreeze briefly.
This variation adds texture and portability. Furthermore, it’s perfect for BBQs, picnics, or birthday parties where finger foods are ideal.
Storage Note: Keep frozen bars in an airtight container and thaw for 5 minutes before serving for best flavor and texture.
Pro Tips for the Best No-Bake Caramilk Cheesecake Every Time
Even though the recipe is simple, small tweaks and thoughtful techniques elevate the outcome from good to unforgettable. Therefore, use these advanced strategies to ensure bakery-level results at home.
Start with Chilled Bowls and Utensils
Because whipped cream forms better in a cold environment, chilling your mixing bowl and beaters beforehand improves results. Additionally, cold cream whips faster and holds peaks longer.
Cool the Caramilk Properly
Although it needs to be melted, never pour hot Caramilk directly into the cream cheese mixture. Instead, let it cool until it’s just warm to the touch. If it’s too hot, it can melt the cream cheese and break the mixture.
Quick Check: Dip a clean finger into the melted chocolate. If it feels warm but doesn’t burn, it’s ready.
Use a Springform Pan with a Removable Base
Even though any dish can work, a springform pan provides professional presentation and easy removal. Accordingly, the cheesecake maintains its shape without hassle.
Upgrade Tip: Line the sides with acetate strips for crisp edges when you remove the mold.
Don’t Skip the Tapping Step
After pouring the filling into the pan, tap it on the counter several times. This removes hidden air bubbles, which otherwise may leave holes or an uneven surface after chilling.
Finishing Touch: Smooth the top with an offset spatula dipped in hot water for a glossy finish.
Furthermore, if you’re interested in decorative touches that elevate home recipes, explore this post about milhojas cake, which showcases visual appeal as a core part of food enjoyment.
Final Chill and Presentation Tips
Presentation plays a big role in dessert appeal. Therefore, take care in the final steps to ensure the cheesecake sets well and looks beautiful.
Chill Time: The More, the Better
Although the minimum chill time is 6 hours, overnight chilling delivers firmer results. Because fats need time to set, this also enhances sliceability and taste.
Prep Tip: Make the cheesecake the night before serving for stress-free hosting.
Serve It Cold, But Not Frozen
Although freezing helps if you’re short on time, don’t serve the cheesecake rock-solid. Let it thaw in the fridge for 30–60 minutes before slicing. If frozen too long, the texture becomes crumbly instead of creamy.
Garnish Just Before Serving
Because moisture can affect toppings, add garnishes like whipped cream, fresh fruit, or shaved chocolate at the last minute. Furthermore, store leftover slices in an airtight container to preserve freshness.
Bonus Tip: Dip your knife in hot water between slices for cleaner cuts.
FAQs About No-Bake Caramilk Cheesecake
Which cream cheese is best for no-bake Caramilk cheesecake?
Full-fat brick-style cream cheese works best. Because it’s dense and stable, it helps the cheesecake firm up. Avoid tub-style or light versions, which contain excess moisture and lack structure.
Why is my no-bake Caramilk cheesecake not firming up?
Usually, soft texture is caused by warm ingredients, low-fat products, or insufficient chill time. Additionally, skipping optional gelatin can affect firmness. For best results, chill the cheesecake for 6–12 hours and ensure all ingredients are cold.
What are common no-bake Caramilk cheesecake mistakes?
Common errors include overmixing the filling, using the wrong type of cream cheese, and skipping the final chill. Furthermore, pouring hot chocolate into the filling can cause curdling or separation.
Can I freeze no-bake Caramilk cheesecake?
Yes, but do so for short periods. Although freezing for slicing is helpful, long-term storage can impact texture. Therefore, wrap tightly and consume within 30 days.
How long can it last in the fridge?
Generally, the cheesecake lasts up to 5 days when covered and chilled properly. However, for peak freshness and texture, enjoy it within 72 hours.
Can I make it ahead of time for a party?
Absolutely. Because it requires chilling, it’s ideal for preparing a day in advance. Also, this makes it a low-stress option for entertaining.
Is gelatin necessary in this recipe?
Although not required, gelatin provides insurance for firmness—especially in warmer climates. However, if using full-fat cream cheese and sufficient chill time, you can skip it.
Can I substitute Caramilk with another chocolate?
Certainly. If Caramilk is unavailable, try caramelized white chocolate or a mix of white chocolate and dulce de leche. However, the flavor may vary slightly.
Conclusion
In conclusion, No-Bake Caramilk Cheesecake offers the perfect combination of flavor, texture, and simplicity. Because it skips the oven, this dessert is approachable and versatile. From basic versions to salted and mini variations, this cheesecake adapts to every occasion.
By following the tips, avoiding common mistakes, and experimenting with creative twists, you’ll consistently deliver a rich, creamy dessert that wows guests and satisfies sweet cravings.
Whether you’re hosting a dinner party, celebrating a birthday, or just treating yourself, this no-bake masterpiece belongs in your dessert repertoire.
Table of Contents

No-Bake Caramilk Cheesecake: Creamy Bliss Without the Oven
- Total Time: 20 minutes
- Yield: 1 standard 8-inch cheesecake (serves 10–12)
Description
Craving a dessert that feels gourmet but requires zero oven time? This No-Bake Caramilk Cheesecake is your answer. With its buttery biscuit base and rich, creamy Caramilk filling, this chilled dessert is perfect for entertaining, family gatherings, or just treating yourself on a weeknight. Best of all, it’s beginner-friendly and made with simple ingredients, yet delivers a luscious, crowd-pleasing finish. Sweet, silky, and bursting with caramelized white chocolate flavor—this cheesecake is as effortless as it is indulgent.
Ingredients
250g digestive biscuits, crushed into fine crumbs
100g unsalted butter, melted
500g full-fat brick-style cream cheese, softened
200g Caramilk chocolate, melted and cooled
250ml whipping cream, whipped to soft peaks
50g icing sugar (adjust to taste)
1 tsp vanilla extract (optional)
1 tbsp gelatin (optional, for a firmer set)
Instructions
Prepare the Crust:
In a bowl, combine crushed digestive biscuits with melted butter until the mixture resembles wet sand. Press firmly into the base of a springform pan using a flat-bottomed glass. Chill in the refrigerator for at least 20 minutes.Make the Filling:
In a large bowl, beat softened cream cheese, icing sugar, and vanilla extract until smooth. Slowly mix in the cooled melted Caramilk chocolate. In a separate bowl, whip cream to soft peaks. Gently fold the whipped cream into the Caramilk mixture. If using gelatin, dissolve it in a small amount of warm water, let it cool slightly, and fold it in now.Assemble the Cheesecake:
Pour the filling over the chilled crust. Smooth the top with a spatula and gently tap the pan to release air bubbles. Cover with cling wrap and refrigerate for at least 6 hours or overnight for best results.
Serve & Garnish (Optional):
Before serving, drizzle with extra melted Caramilk, sprinkle with chopped nuts, sea salt, or decorate with chocolate shavings for a stunning finish.
Notes
For a salted twist, sprinkle flaky sea salt over the top or swirl in salted caramel before chilling.
To make individual servings, layer in small jars or dessert glasses—perfect for picnics or parties.
Use full-fat, brick-style cream cheese only. Avoid spreadable or whipped varieties for best texture.
To firm it up quickly, chill in the freezer for 30–45 minutes before serving.
Want to impress? Garnish with edible gold leaf for an extra-luxe finish.
- Prep Time: 20 minutes
- Cook Time: 0 minutes
- Category: Dessert
- Cuisine: Australian-Inspired
Nutrition
- Calories: 410
- Fat: 30g
- Carbohydrates: 29g
- Protein: 5g

1 thought on “No-Bake Caramilk Cheesecake: Creamy Bliss Without the Oven”