Few desserts capture the perfect blend of creamy and fruity flavors quite like strawberry banana pudding. This classic treat layers silky vanilla pudding with fresh bananas, ripe strawberries, and crunchy vanilla wafers, creating an irresistible harmony of textures and tastes. Whether you’re making it for a family gathering, a potluck, or a cozy dessert night at home, this easy-to-follow recipe guarantees delicious results.
What makes this dessert even better is its simplicity. You don’t need any complicated techniques or specialty ingredients. Plus, the combination of sweet bananas and juicy strawberries ensures a naturally delightful flavor. We’ll break down everything you need to know, from ingredient selection to layering techniques and expert tips for the best results.
Table of Contents
Why You’ll Love This Recipe
- Easy to Make: This dessert requires minimal prep time, making it perfect for any skill level.
- Naturally Sweet: Ripe bananas and fresh strawberries add natural sweetness without needing too much sugar.
- Perfect for Any Occasion: Whether it’s a summer picnic or a holiday dinner, this pudding is always a hit.
- Customizable: You can adjust ingredients to fit dietary preferences, such as using dairy-free alternatives or reducing sugar.
Ingredients and Instructions
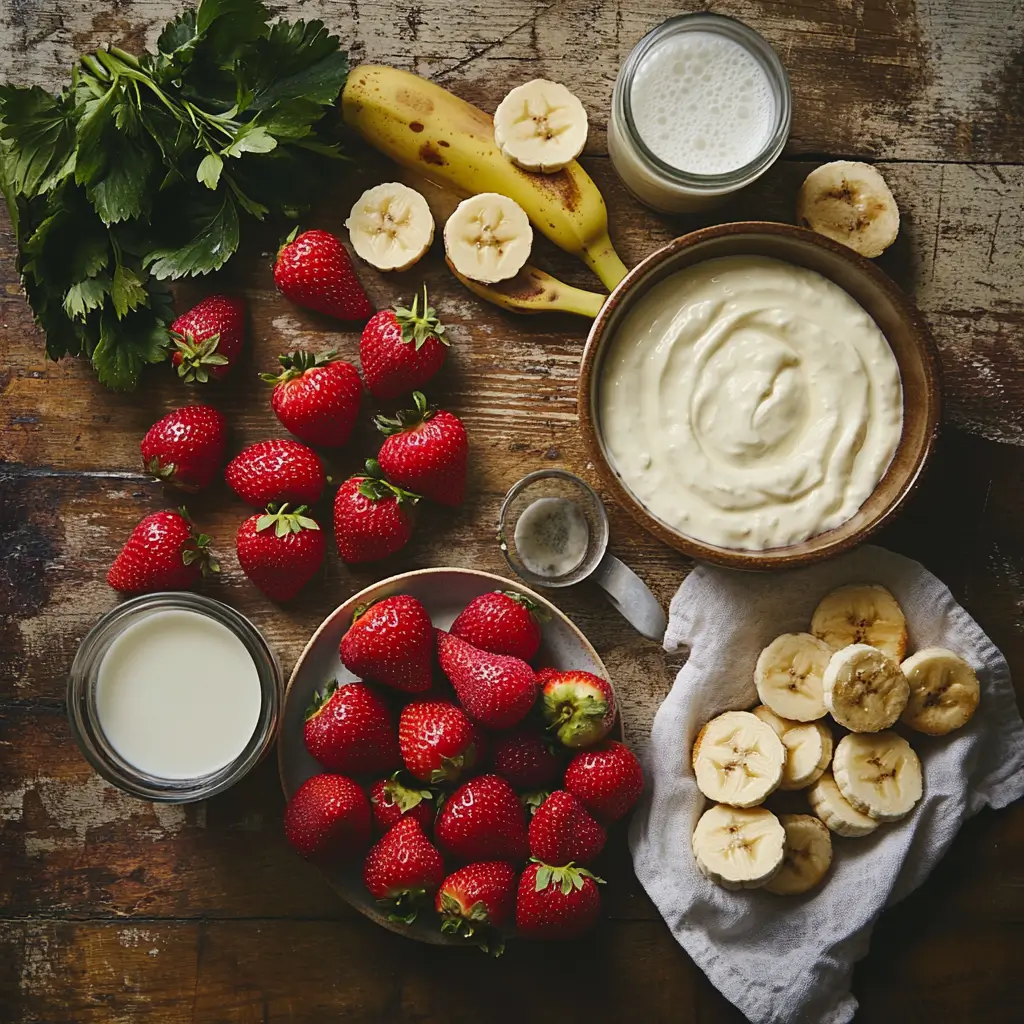
To create a truly unforgettable strawberry banana pudding, it’s essential to use fresh, high-quality ingredients. Below is a comprehensive breakdown of what you’ll need.

Ingredients List
| Ingredient | Amount | Notes |
|---|---|---|
| Ripe bananas | 2 large | Sliced thin |
| Fresh strawberries | 1 cup | Hulled and sliced |
| Vanilla pudding mix | 1 package | Instant or homemade |
| Whole milk | 2 cups | Can substitute almond milk |
| Whipped cream | 1 cup | Homemade or store-bought |
| Vanilla wafers | 1 cup | Can substitute graham crackers |
| Lemon juice | 1 tbsp | Helps prevent banana browning |
| Honey or maple syrup | 1 tbsp | Optional for added sweetness |
Step-by-Step Instructions
Step 1: Prepare the Vanilla Pudding
- In a mixing bowl, whisk together the vanilla pudding mix and cold milk until smooth.
- Let the mixture sit for five minutes to allow it to thicken properly.
- If using homemade pudding, ensure it’s completely cooled before proceeding.
Step 2: Slice and Prep the Fruit
- Peel and slice the bananas into thin, even pieces.
- Toss them with lemon juice to prevent browning.
- Hull and slice the strawberries into uniform pieces.
Pro Tip: Use ripe but firm bananas to maintain texture without becoming too mushy.
Step 3: Layer the Pudding
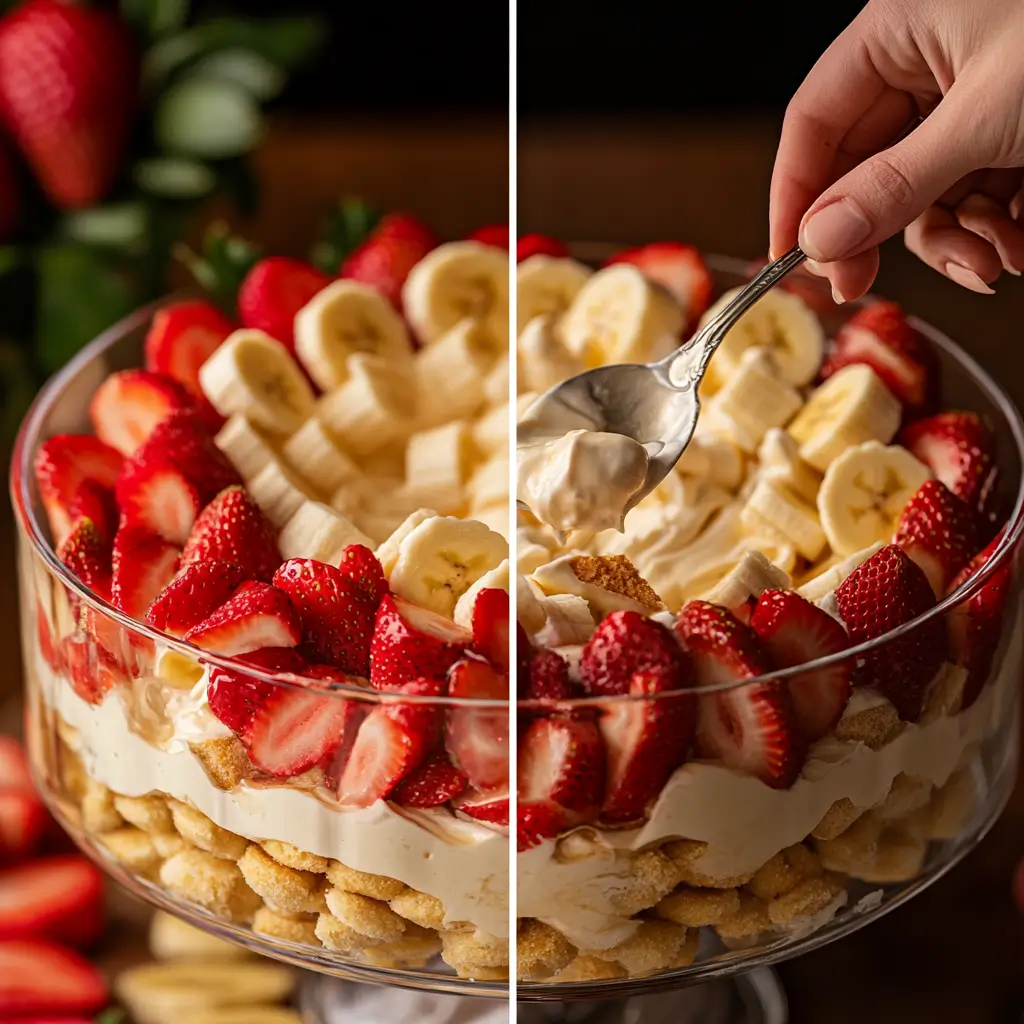
- Start with a layer of vanilla pudding at the bottom of your serving dish.
- Add a layer of vanilla wafers, ensuring they slightly overlap for even coverage.
- Arrange banana slices evenly over the wafers, followed by a layer of strawberries.
- Repeat the layers until all ingredients are used, finishing with a top layer of pudding.
Step 4: Add the Finishing Touches
- Top the final layer with whipped cream for an extra creamy finish.
- Garnish with additional banana slices and fresh strawberries for decoration.
- Optionally, drizzle a bit of honey or maple syrup for enhanced sweetness.
Step 5: Chill and Serve
- Cover the dish with plastic wrap and refrigerate for at least two hours before serving.
- For the best results, let it chill overnight to allow the flavors to meld together.
Expert Tip: The longer it chills, the more flavorful the pudding becomes as the wafers soften slightly, absorbing the creamy texture.
Step 6: Mastering the Layering Process
While layering may seem straightforward, getting it just right makes a big difference in taste and presentation. Follow these layering tips to achieve the perfect balance of flavors and textures in every bite:
Layering Like a Pro
- Begin with a Smooth Base: Start with a thin layer of vanilla pudding at the bottom of your serving dish. This prevents the wafers from becoming overly soggy and creates a creamy foundation.
- Strategic Cookie Placement: Arrange whole vanilla wafers in a single layer, ensuring they slightly overlap. This creates a sturdy texture that holds up well when scooping.
- Banana and Strawberry Balance: Alternate between thinly sliced bananas and strawberries. Even distribution is key to ensuring every bite includes the perfect fruit-to-pudding ratio.
- Repeat Thoughtfully: Continue layering until all ingredients are used, ensuring the top layer remains pudding for a smooth and polished final look.
Pro Tip: If you want extra crunch, reserve some whole wafers and crumble them just before serving for added texture.
Step 7: Adjusting Sweetness and Flavors
The beauty of homemade pudding is that you can customize the sweetness level to suit your preferences. Here are some simple ways to adjust flavors:
Making It Sweeter
- Honey or Maple Syrup: Drizzle a small amount between layers for natural sweetness.
- Caramel Sauce: A light caramel drizzle before serving adds a rich, buttery touch.
Reducing Sweetness
- Use Unsweetened Whipped Cream: Store-bought varieties often contain added sugar.
- Opt for Less Sweet Cookies: Try graham crackers instead of vanilla wafers for a milder flavor.
Step 8: The Importance of Chilling Time
One of the most crucial steps is allowing your pudding to rest in the refrigerator before serving. This enhances its flavor and creates the perfect texture.
| Chilling Time | Effect on Texture and Taste |
|---|---|
| 2 hours | A quick chill—good, but wafers remain crunchy. |
| 6-8 hours | Ideal—allows wafers to soften slightly for a creamy consistency. |
| Overnight | Best flavor—pudding fully absorbs flavors, creating a rich, indulgent texture. |

What Makes This Strawberry Banana Pudding So Special?
This pudding stands out because of its perfect balance of flavors and textures. The creamy pudding contrasts beautifully with the slight crunch of vanilla wafers, while the fresh fruit adds a naturally sweet and refreshing taste.
- Creamy and Smooth: The vanilla pudding provides a rich, velvety base.
- Fresh and Fruity: The blend of ripe bananas and juicy strawberries adds a natural sweetness.
- Perfectly Balanced Texture: The wafers offer a subtle crunch that softens over time, creating the perfect consistency.
Additionally, chilling overnight enhances the flavors, making it even more delicious the next day.
Bonus Tips for the Best Strawberry Banana Pudding
1. Choose the Right Bananas
- Use bananas that are ripe but firm to prevent mushiness. Overripe bananas will make the pudding too soft.
- If you only have overripe bananas, mash them into the pudding mixture instead of slicing them.
2. Experiment with Different Layers
- Try adding chocolate shavings or crushed nuts between layers for extra texture.
- Swap vanilla wafers for ladyfingers or graham crackers for a unique twist.
3. Make It Dairy-Free
- Replace milk with almond or coconut milk for a dairy-free version.
- Use coconut whipped cream instead of traditional whipped topping.
4. Serve It in Different Ways
- Individual Portions: Use small jars or cups for a fun, personalized touch.
- Parfait Style: Alternate layers in a tall glass for a fancy presentation.
- Frozen Treat: Freeze for a couple of hours for a chilled summer dessert.
Pro Tip: A sprinkle of cinnamon or nutmeg on top enhances the overall flavor profile.
How to Serve Strawberry Banana Pudding
Presentation enhances the dining experience. While this pudding tastes amazing straight from the dish, serving it in creative ways makes it even more enjoyable.
1. Classic Family-Style Presentation
This is the traditional way to serve pudding—in a large trifle dish or deep glass bowl, where guests can scoop out individual portions.
2. Individual Dessert Cups
For a personalized touch, layer the pudding into small glass cups or mason jars. This makes serving easy and prevents portioning issues.
3. Elegant Plated Dessert
For a fancier presentation, scoop pudding onto small dessert plates and garnish with:
- A strawberry fan or banana slice on top.
- A sprinkle of cinnamon for a warm, aromatic touch.
- A light dusting of crushed wafers for extra texture.
Pro Tips & Variations
Now that you’ve mastered the classic version, here are some creative ways to make this recipe your own.
1. Dairy-Free Strawberry Banana Pudding
For a lactose-free version, swap out the dairy ingredients:
- Milk Alternative: Almond, oat, or coconut milk works well.
- Whipped Cream Alternative: Use coconut whipped cream for a light, airy topping.
2. Healthier Pudding Alternative
If you’re looking for a lighter version:
- Replace pudding with Greek yogurt for added protein.
- Use unsweetened granola instead of wafers for a nutritious crunch.
3. Chocolate Lover’s Twist
For a decadent upgrade, incorporate chocolate elements:
- Chocolate Pudding: Replace vanilla pudding with chocolate-flavored pudding for a rich, cocoa-filled dessert.
- Chocolate Chips: Sprinkle mini chocolate chips between layers for bursts of sweetness.
FAQs
What Makes Bananas Not Turn Brown in Pudding?
Bananas turn brown due to oxidation, but you can slow this process down by:
Tossing banana slices in lemon or pineapple juice before layering.
Keeping the pudding covered with plastic wrap pressed directly onto the surface.
Adding bananas just before serving for the freshest look.
What Thickens Banana Pudding?
The pudding gets its thick texture from:
Cornstarch: The primary thickening agent in homemade pudding.
Instant Pudding Mix: Commercial mixes contain stabilizers that set quickly with milk.
Chilling Time: As the pudding sits, it firms up to a creamy consistency.
Should I Make Banana Pudding the Day Before?
Yes! Making it ahead enhances the flavors and softens the wafers slightly for a more balanced texture. If you want to maintain a crispier crunch, add the wafers right before serving.
What Can You Use Instead of Vanilla Wafers in Banana Pudding?
If you’re looking to switch up the texture, try:
Graham Crackers: A classic, slightly sweeter option.
Shortbread Cookies: Buttery and rich, perfect for a more indulgent pudding.
Ladyfingers: Softer in texture, giving a tiramisu-like consistency.
What Goes Well with Strawberries?
Strawberries complement a variety of flavors, including:
Chocolate: Try drizzling chocolate syrup for added richness.
Nuts: Chopped almonds or pecans create a satisfying crunch.
Fresh Mint: A few mint leaves add a refreshing contrast.
Conclusion
Strawberry banana pudding is a delightfully creamy, fruit-filled dessert that’s easy to prepare and perfect for any occasion. Whether you’re making a traditional version, a dairy-free alternative, or an indulgent chocolate twist, this recipe is versatile, crowd-pleasing, and endlessly customizable.
By following the expert tips, layering techniques, and flavor enhancements outlined in this guide, you can create the best homemade strawberry banana pudding with ease. So, grab your ingredients, start layering, and enjoy every spoonful of this irresistibly smooth and flavorful dessert!
Print
Strawberry Banana Pudding: A Fruity, Creamy Delight
- Total Time: 15 minutes
- Yield: 1 medium trifle dish or 6 individual servings
Description
Few desserts capture the perfect blend of creamy and fruity flavors quite like strawberry banana pudding. This classic treat layers silky vanilla pudding with fresh bananas, ripe strawberries, and crunchy vanilla wafers, creating an irresistible harmony of textures and tastes. Perfect for family gatherings, potlucks, or a cozy dessert night, this easy-to-follow recipe guarantees delicious results with minimal effort.
Ingredients
- 2 large ripe bananas – sliced thin
- 1 cup fresh strawberries – hulled and sliced
- 1 package vanilla pudding mix – instant or homemade
- 2 cups whole milk – can substitute almond or coconut milk
- 1 cup whipped cream – homemade or store-bought
- 1 cup vanilla wafers – can substitute graham crackers or ladyfingers
- 1 tbsp lemon juice – prevents banana browning
- 1 tbsp honey or maple syrup – optional for added sweetness
Instructions
Step 1: Prepare the Vanilla Pudding
- In a mixing bowl, whisk together the vanilla pudding mix and cold milk until smooth.
- Let the mixture sit for 5 minutes to allow it to thicken properly.
- If using homemade pudding, ensure it’s completely cooled before proceeding.
Step 2: Slice and Prep the Fruit
- Peel and slice the bananas into thin, even pieces.
- Toss them with lemon juice to prevent browning.
- Hull and slice the strawberries into uniform pieces.
✅ Pro Tip: Use ripe but firm bananas to maintain texture without becoming too mushy.
Step 3: Layer the Pudding
- Start with a layer of vanilla pudding at the bottom of your serving dish.
- Add a layer of vanilla wafers, slightly overlapping for even coverage.
- Arrange banana slices evenly over the wafers, followed by a layer of strawberries.
- Repeat the layers until all ingredients are used, finishing with a top layer of pudding.
Step 4: Add the Finishing Touches
- Top the final layer with whipped cream for an extra creamy finish.
- Garnish with additional banana slices and fresh strawberries.
- Optionally, drizzle a bit of honey or maple syrup for enhanced sweetness.
Step 5: Chill and Serve
- Cover the dish with plastic wrap and refrigerate for at least 2 hours before serving.
- For the best results, let it chill overnight to allow the flavors to meld together.
✅ Expert Tip: The longer it chills, the more flavorful the pudding becomes as the wafers soften slightly, absorbing the creamy texture.
Notes
✅ Make It Dairy-Free
- Use almond milk or coconut milk instead of whole milk.
- Substitute regular whipped cream with coconut whipped cream.
✅ Experiment with Layers
- Add chocolate shavings or crushed nuts for extra texture.
- Swap vanilla wafers for ladyfingers or graham crackers for a unique twist.
✅ Serving Ideas
- Classic Family-Style: Serve in a large trifle dish.
- Individual Dessert Cups: Use small jars for a personalized touch.
- Elegant Plated Dessert: Scoop pudding onto small plates and garnish with a strawberry fan or banana slice.
✅ Storage
- Store in an airtight container in the refrigerator for up to 3 days.
- Do not freeze as the bananas may become mushy.
- Prep Time: 15 minutes
- Cook Time: 0 minutes
- Category: Breakfast
- Cuisine: American
Nutrition
- Calories: ~220 kcal
- Fat: ~6g
- Carbohydrates: ~38g
- Protein: ~4g

1 thought on “Strawberry Banana Pudding: A Fruity, Creamy Delight”